One-Pan Asian Ground Beef and Rice Recipe this one takes me straight back to a steamy, too-bright hostel kitchen in Tokyo, way past midnight. I remember watching a Malaysian backpacker throw together something wild in a single pan.
Soy sauce, garlic, beef, rice done in 12 minutes, and the whole place smelled like heaven had just been stir-fried. I didn’t even ask what it was. I just stood there, stunned, and took mental notes like my life depended on it.
This recipe? This is the leveled-up version of that moment. Cleaner, smarter, stacked with pro tricks but still rooted in the chaotic joy of tossing great stuff in a hot pan and watching the flavor explode.
What Is It and Why It Hits So Hard
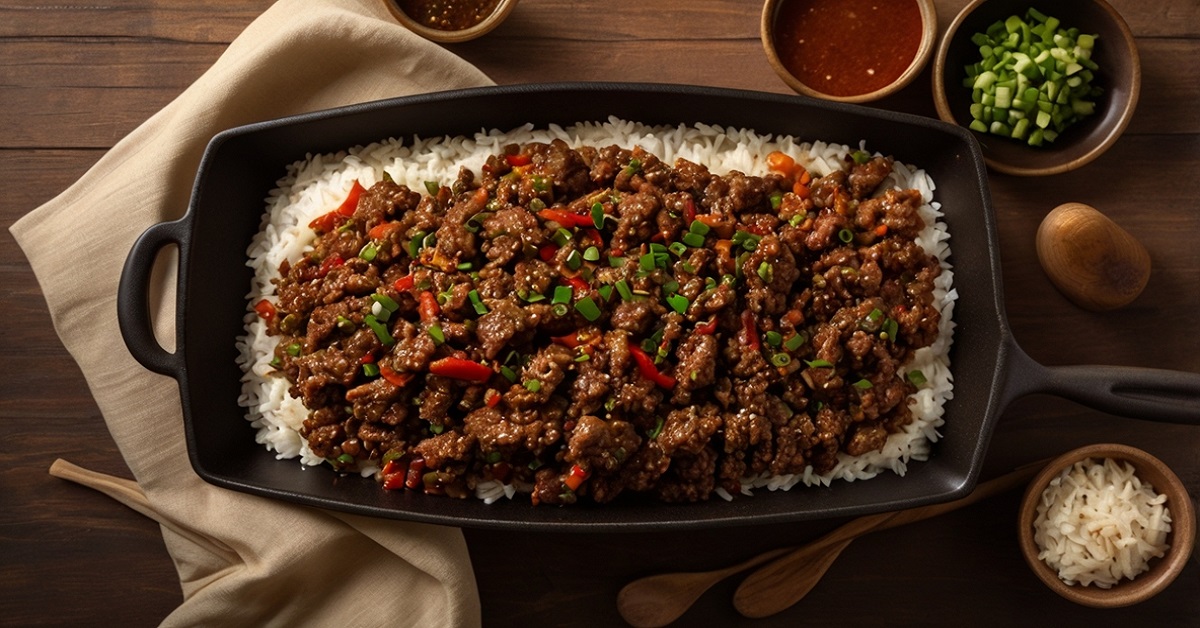
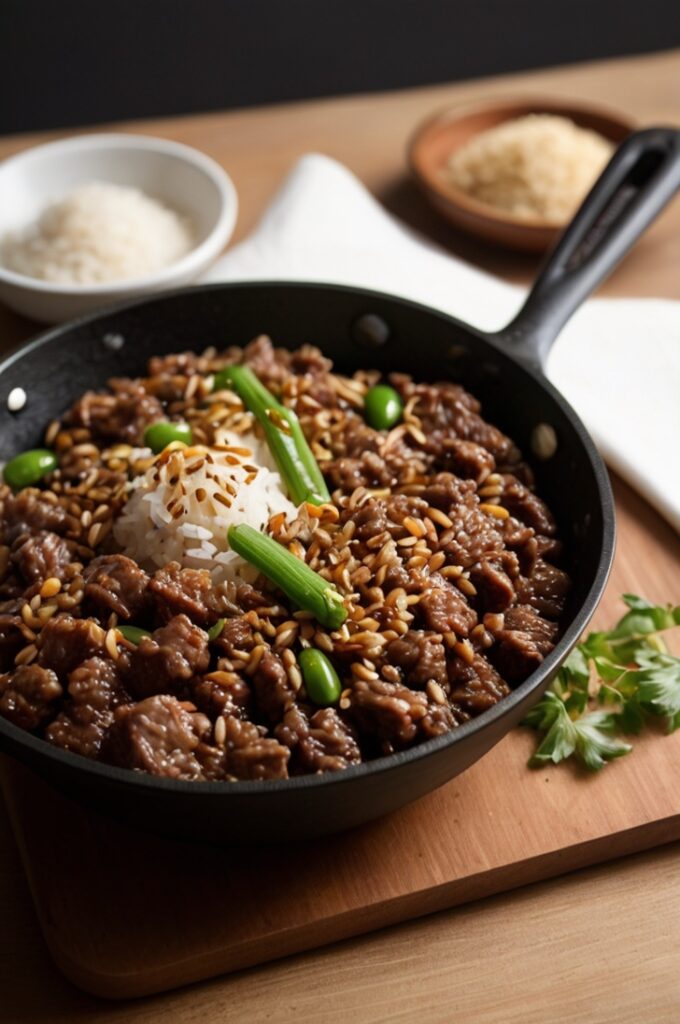
This One-Pan Asian Ground Beef and Rice Recipe is fast, bold, and deeply savory. It’s weeknight-friendly but doesn’t taste like a compromise. You’re getting juicy ground beef, fluffy rice that soaks up every drop of sauce, and crisp veggies that still snap when you bite ’em. All of it clinging to a sticky-sweet, garlicky, umami-rich sauce that’s one foot in Korea, another in China, and a wink from Southeast Asia.
No rice cooker. No separate veggie sauté. No “serve immediately with another dirty dish.” Just one pan. High heat. Big flavor. You got 30 minutes? Then dinner’s already late.
Let’s break this down like we mean it.
Ingredients & Substitutions

The Essentials
- 1 lb (450g) ground beef – Go for 80/20 if you want some real flavor depth. Leaner is cleaner, but won’t hit the same.
- 1 cup uncooked jasmine rice – Rinsed until water runs clear. Don’t skip this. Cloudy rice = gummy rice.
- 1 small yellow onion, finely chopped – Shallots work if you’re feeling delicate. Red onion? Not bad, just a bit sweeter.
- 4 garlic cloves, minced – Fresh only. Pre-minced from the jar is for emergency mac & cheese.
- 1 tbsp fresh ginger, grated – Sub with ½ tsp ground ginger in a pinch, but it ain’t the same.
- 1 ½ cups beef stock – Low-sodium. You wanna control the salt, not the other way ’round.
- 3 tbsp soy sauce – Use a dark soy for depth or a mix of light and dark. Tamari if you’re gluten-free.
- 1 tbsp oyster sauce – Optional but game-changing. That thick glossy umami? Comes from this.
- 1 tsp sesame oil – Just at the end, never cooked. It’s perfume, not frying oil.
- 1–2 tsp brown sugar – Cuts the salt. Not to be skipped unless you like things mean and sharp.
- 1 cup frozen peas and carrots – Straight from the bag. No shame here. Just don’t overcook.
- 2 green onions, sliced – For garnish and bite.
- Toasted sesame seeds – A sprinkle at the end gives texture and a nutty finish.
- Chili flakes (optional) – For that back-of-the-throat warmth. Don’t go overboard.
Smart Swaps
- Ground chicken or turkey – Works fine but needs help. Splash of fish sauce or extra soy for depth.
- Rice alternatives – Basmati if you must, but jasmine carries that slight floral aroma. Cauliflower rice? Sure, but reduce your stock by half and don’t expect miracles.
- Vegetables – Bell peppers, chopped baby bok choy, even finely shredded cabbage plays well. Keep the moisture content in mind.
Pro tip: If you’re cooking for a crowd, bulk it up with an extra egg scrambled into the mix. Suddenly it’s got fried rice energy without the day-old rice.
Step-by-Step Instructions
Step 1: Get That Beef Sizzlin’
Heat a large nonstick or carbon steel pan over medium-high. Add a drizzle of neutral oil (not olive, not butter). Toss in your ground beef. Break it up quick, then let it sit. Brown it, don’t boil it.
Pro trick: Let parts of it get crispy. Those little browned bits? That’s flavor don’t rush.
Season lightly with salt. Not too much your sauces will do the heavy lifting later.
Step 2: Aromatics Hit the Pan
Toss in your chopped onions. Let them go translucent, maybe even a little golden. In goes the garlic and ginger. Stir constantly, don’t let it burn.
You’re building the base now. If your pan smells like a Chinatown night market, you’re doing it right.
Common mistake? Dumping wet garlic into lukewarm oil. You’ll never get that sharp, toasty bite.
Step 3: Add the Rice Dry
Yes, the raw rice. Straight in. Stir it around with the beef and aromatics for 1–2 minutes. This toasts the grains slightly and coats them in fat and flavor.
Skip this and your rice might cook, but it’ll be bland and gummy. Toasting changes everything.
Step 4: Time for Liquids
Pour in the beef stock, soy sauce, oyster sauce, brown sugar. Stir to combine. Scrape up anything sticking to the bottom those sticky bits are your bonus seasoning.
Bring it all to a boil. Then immediately drop the heat to low and cover the pan.
Let it simmer gently for about 18–20 minutes.
Watch the steam! Every time you lift the lid, you’re setting yourself back by 2 minutes.
Step 5: Veggie Drop
At around minute 15, toss in your peas and carrots. No need to thaw ’em. Stir gently and re-cover.
They’ll steam-cook in those last few minutes. Perfect texture, perfect timing.
Step 6: Finish Strong
Once rice is cooked and liquid’s mostly absorbed, turn off the heat.
Fluff gently with a fork. Not a spoon. Not a spatula. Fork keeps the rice from clumping.
Drizzle with sesame oil, toss in green onions, maybe a dash of chili flakes if you’re feeling wild.
Sprinkle with sesame seeds.
Stand back and admire your one-pan empire.
Cooking Techniques & Science
Let’s talk rice science.
Toasting the rice before liquid adds a Maillard-ish edge. It’s not true browning, but the slight nutty undertone makes the finished dish way more layered.
Simmering covered traps steam, allowing the rice to absorb liquid slowly and evenly. Lift that lid too often? Uneven cooking and crunchy centers.
Why oyster sauce? It adds glutamates natural umami that makes meat taste meatier. Same reason we love anchovies and miso. They cheat the flavor system.
Sesame oil should never be cooked. It burns, gets acrid. Always finish with it. Think of it like a cologne last thing before you walk out.
Tool tip: A wide, deep sauté pan or nonstick wok works best. Avoid cast iron unless it’s well-seasoned and you don’t mind potential rice sticking.
Serving & Pairing Suggestions
Scoop the beef and rice into wide bowls. Top with extra green onion curls, maybe a soft-fried egg if you wanna flex.
A quick cucumber salad on the side? That’s your crunchy contrast.
Drinks? Cold lager, green tea, or a crisp riesling if you’re fancying up.
Want a full meal spread? Pair with spicy kimchi, a miso soup starter, and chilled pickled radish.
Or just eat it straight outta the pan. We’re not judging. Actually, we are and we respect it.
FAQs About One-Pan Asian Ground Beef and Rice Recipe
1. Can I use cooked rice instead of raw?
Yes, but skip the stock and reduce sauce amounts. You’re basically making fried rice at that point. Still good but a whole different beast.
2. How do I store leftovers?
Cool it fast. Airtight container. Fridge for up to 4 days. Reheat gently with a splash of water or stock to loosen it up.
3. What if my rice isn’t fully cooked after 20 minutes?
Add ¼ cup hot water, re-cover, and simmer another 3–5 minutes. Some pans just don’t trap steam well.
4. Can I make this vegetarian?
Yes. Swap beef for crumbled tofu or tempeh. Use mushroom broth instead of beef stock. Add a little extra soy and sesame for richness.
5. What’s the best rice to use?
Jasmine, hands down. Basmati’s too dry, sushi rice too sticky. Long grain white rice works in a pinch
but jasmine gives you that little extra soul.
Let the pan speak. Let the rice sing. Let the beef crisp. And above all? Eat while it’s hot. That’s where the magic lives.
Conclusion
This dish is fast, fierce, and flexible. It’s the blueprint for how one-pan meals should be built on layers, not shortcuts.
What makes it special? The little things. Toasting the rice. Timing the veggie drop. Drizzling the sesame last.
Master this and you’ve got a weeknight savior, a late-night cure, and a show-off meal for when you wanna impress someone using just your stovetop.
Don’t overthink it. Just heat the pan, trust your nose, and let the sauce do the talking.
Final Pro Tips
- Don’t overcrowd the beef. If the pan’s small, cook in two batches.
- Want it saucier? Add a splash of water and soy at the end.
- For texture contrast, throw in a handful of chopped roasted peanuts or cashews.


