
Homemade Marshmallow Mug Toppers Recipe ever laid one of those soft, sweet disks on a mug of hot chocolate and watched it puff like a little cloud trying to escape Earth’s gravity? There’s a kind of magic in that.
Especially when the marshmallow is homemade still tender, fresh as snow, with a vanilla warmth that makes you feel like someone just gave you a hug and didn’t let go too quick.
Back in pastry school, we’d pipe marshmallow into all sorts of molds hearts, stars, birds, once even a tiny espresso cup. But mug toppers? They’re a cozy little evolution of form and function.
Designed to sit snug on a mug, melt just enough at the edges, and soften with steam these are the marshmallows that dress hot drinks like a little velvet jacket.
They’re not just adorable. They’re clever. They float. They soften. They taste like the childhood you wished you had but made with professional finesse.
These aren’t your bagged, bouncy sugar cubes. This is the real deal marshmallow from scratch. Pillowy, cut clean, melts slow. And guess what? They’re easier than people think.
What Are Marshmallow Mug Toppers?
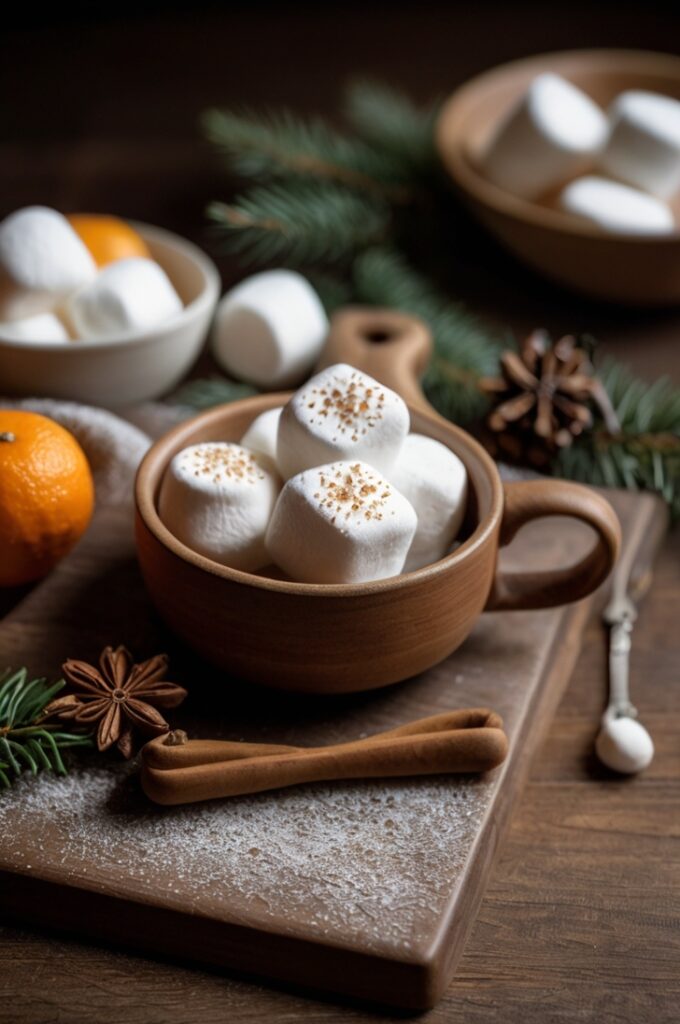
They’re large-format marshmallows, cut into discs that sit neatly on top of a hot drink. Usually cocoa, sometimes coffee if you’re bold.
Think of ‘em like a warm, soft lid. But edible. And a little indulgent. They float for a bit, soften at the edges, then melt into the drink like sweet fog rolling over a hill.
Homemade ones beat store-bought any day. Why? Texture, flavor, and the chance to play with it vanilla bean specks, peppermint oil, freeze-dried strawberry dust. No two batches need be the same.
Ingredients & Substitutions
This isn’t a big ingredient list. But the quality of each bit? Yeah, that matters.
Ingredients:
- 3 packets (21g) unflavored powdered gelatin
- 1 cup cold water, divided
- 1 ½ cups granulated sugar
- 1 cup light corn syrup
- ¼ tsp kosher salt
- 2 tsp pure vanilla extract (or paste if you’re fancy)
- ½ cup powdered sugar, for dusting
- ½ cup cornstarch, for dusting
Substitutions & Tips:
Gelatin
You need good bloom strength 200+ bloom gelatin will yield the best bounce. Sheet gelatin can work too. Use gold grade: 5 sheets for 3 packets.
Corn Syrup
This stabilizes the sugar so it doesn’t crystallize. If you’re in the UK, golden syrup works, but gives a caramel note. Not bad. Just different.
Vanilla
Pure extract makes all the difference. Artificial stuff? Nah. Use paste if you want those little black flecks that scream “artisan.”
Dusting Powder
You’ll mix powdered sugar and cornstarch to coat the marshmallows. It prevents stickiness. Do not skip it unless you enjoy regret.
For color or flavor changes, you can add:
- Peppermint extract (½ tsp)
- Rose water (⅛ tsp, go easy)
- Beet juice or freeze-dried fruit powder for color
Step-by-Step Instructions
Here’s how you go from gelatin powder to marshmallow dreams.
1. Bloom the Gelatin
Pour ½ cup cold water into the bowl of a stand mixer. Sprinkle gelatin on top. Let it bloom for at least 10 minutes.
Pro Tip: Use cold water or the gelatin may clump and not hydrate right. No one wants sad marshmallow sponge.
2. Cook the Sugar Syrup
In a heavy-bottomed saucepan, combine:
- 1 ½ cups sugar
- 1 cup corn syrup
- ½ cup water
- ¼ tsp salt
Stir just to combine. Then don’t stir again.
Clip on a candy thermometer. Bring to a boil over medium-high heat. Cook to 240°F (soft ball stage). This usually takes 8–10 minutes.
Mistake to Avoid: Stirring during boiling can cause crystallization. Be patient. Let the bubbles do their thing.
3. Whip It
Once syrup hits 240°F, carefully pour it into the bloomed gelatin while the mixer is on low. Use the whisk attachment.
Gradually increase speed to high. Whip 10–12 minutes, until thick, white, fluffy, and just barely warm.
Add vanilla in the last minute.
Pro Tip: Don’t overwhip. It’ll start setting in the bowl and you’ll be scooping marshmallow cement. Once it holds soft peaks and ribbons, you’re golden.
4. Pour and Set
Grease a quarter sheet pan or 9×13” dish. Line with parchment. Grease that too.
Sift half the dusting powder over the bottom.
Pour in the marshmallow. Spread with an offset spatula. It’ll be sticky. Like angry glue.
Dust the top with the rest of the sugar/cornstarch mix.
Let it sit uncovered at room temp for at least 6 hours or overnight. Patience makes pillowy marshmallows.
5. Cut into Mug Toppers
Use a 2.5 to 3” round cutter to punch out discs. (Or whatever size fits your mugs.)
Dust edges with more powder to keep ’em from sticking.
Store in an airtight container at room temp for up to 5 days.
Cooking Techniques & Marshmallow Science
Why We Bloom Gelatin First
Hydrating it in cold water lets it fully dissolve when hot syrup’s added. No bloom = no proper structure.
Why 240°F?
That’s soft-ball stage. Any lower and the marshmallows are goo. Higher and they’re chewy or tough. You want that delicate pull not gummy rubber.
Why Whip So Long?
You’re not just mixing. You’re aerating. Building volume and texture. More air = fluffier ‘mallows.
Why No Stirring After Boil Begins?
Sugar wants to crystallize. Stirring tempts it. Crystals = gritty marshmallows. Leave it alone.
Essential Tools
- Stand mixer. No hand mixing unless you enjoy suffering.
- Candy thermometer. Accurate temp is everything here.
- Offset spatula for smoothing.
- Bench scraper or cutter for clean cuts.
Serving & Pairing Suggestions

Float one right on top of a steaming mug of cocoa. Or hot coffee. Or boozy Irish cream lattes if it’s been that kind of week.
Dust them in cocoa powder for a grown-up finish. Or dip the bottoms in dark chocolate. Chill to harden. Hello, layered texture.
Add a few flakes of Maldon salt on top if you’re into the salty-sweet thing. (You should be.)
Serve with biscotti, whipped cream, or even espresso for dunking. Yeah. Marshmallow dunked in espresso. You heard me.
FAQs About Homemade Marshmallow Mug Toppers Recipe
1. Can I make marshmallow mug toppers without a stand mixer?
Technically yes but you’ll be whisking molten syrup by hand for 10+ minutes. Not recommended unless you’ve got Popeye forearms.
2. How long do they last?
Up to 5 days in an airtight container at room temp. They’ll start to dry out after that. Still edible, just less fluffy.
3. Can I freeze them?
Kinda. They’ll hold their shape, but texture might suffer a bit. Best eaten fresh.
4. Are they vegetarian?
Not as written. But you can sub in agar agar. You’ll need to rework the ratios, though it’s not a 1:1 sub. Agar sets differently.
5. What if I don’t have corn syrup?
Golden syrup works. Brown rice syrup too, but it’s thicker. You want something that prevents crystallization, so honey isn’t ideal.
Would you like a printable version or visual diagram of the process steps?
Final Thoughts Homemade Marshmallow Mug Toppers Recipe
This ain’t just a cute garnish. A homemade marshmallow mug topper is like a tiny act of joy. It’s thoughtful. Nostalgic. Professionally executed, it elevates the humble mug of cocoa into something people remember.
You’re not just making marshmallow. You’re making moments.
Remember to use a thermometer. Whip it good. And don’t cheap out on the vanilla.
Want to get wild? Add cinnamon. Or cardamom. Or rum. Or lemon oil. Marshmallow doesn’t care. It’ll take what you give it and make it taste like a hug.
